


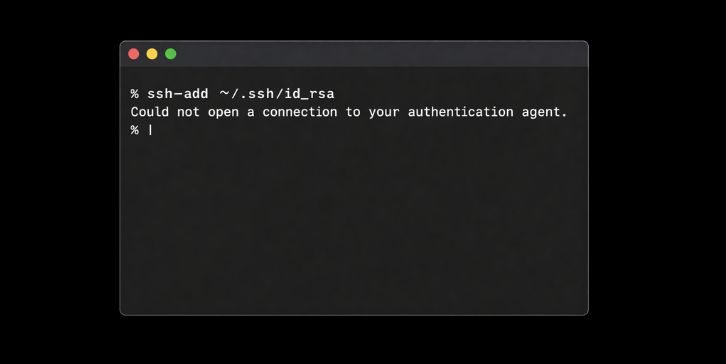
You run the ssh-add command in your terminal to add an SSH private key, but instead of working, the terminal prints the message “could not open a connection to your authentication agent.” This problem often appears when developers try to configure SSH authentication for Git repositories or remote servers.
The error usually happens because the SSH agent is not running or the terminal session cannot communicate with it. This guide explains what the message means, why it appears in Linux, Ubuntu, or macOS terminal environments, and how to fix the problem so you can load your SSH keys and continue working with tools like GitHub, GitLab, or remote servers.
What Does “Could Not Open a Connection to Your Authentication Agent” Mean?
The error message “could not open a connection to your authentication agent” appears when the ssh-add command cannot communicate with the SSH agent process running on your system. The SSH agent is a background program that stores decrypted SSH private keys in memory. This allows the system to authenticate with servers or Git services without asking for the key passphrase every time.
When you run commands such as ssh-add or connect to a remote server, the terminal sends a request to the SSH agent. If the agent is not running, or if the terminal cannot find it through the SSH_AUTH_SOCK environment variable, the request fails. Because of that, the system cannot load the private key and displays the authentication agent error message.
Users typically encounter this issue in a Linux terminal, macOS Terminal, or other Unix shell environments while trying to authenticate with platforms such as GitHub, GitLab, or a remote SSH server.
Common Causes of the Authentication Agent Error
This problem usually happens because the SSH agent process is not active or the shell session does not know where the agent socket is located. It can also occur after opening a new terminal window or when switching between different shell environments.
Common causes include:
- The SSH agent process is not started
- The SSH_AUTH_SOCK environment variable is missing or incorrect
- The terminal session started without initializing the SSH agent
- Shell configuration files such as .bashrc or .zshrc do not start the agent
- Running commands inside containers or restricted shells
- The SSH agent process stopped or crashed
- Incorrect file permissions on the SSH private key
These conditions prevent the terminal from connecting to the authentication agent responsible for managing SSH keys.
How to Fix “Could Not Open a Connection to Your Authentication Agent”?
Fixing this error usually involves starting the SSH agent manually or reconnecting the terminal session to the agent process. In most cases, a few simple commands will restore the connection.
Fix #1: Start the SSH Agent
The most common solution is to start the SSH agent manually. This command launches the background process that manages SSH keys.
Run the following command in the terminal:
After running this command, the system will start the SSH agent and display the process ID.
Fix #2: Add the SSH Key Again
Once the agent is running, you can add your SSH private key to the agent.
Follow these steps:
- Start the SSH agent if it is not running.
- Run the command
ssh-add. - If required, specify the path to the key file such as
~/.ssh/id_rsa. - Enter the key passphrase when prompted.
The key is now stored in the agent and ready for authentication.
Fix #3: Check the SSH_AUTH_SOCK Environment Variable
The terminal uses the SSH_AUTH_SOCK environment variable to locate the authentication agent socket.
You can check this variable with the command:
echo $SSH_AUTH_SOCK
If the variable is empty, the terminal cannot communicate with the SSH agent. Starting the agent again usually recreates this variable automatically.
Fix #4: Restart the Terminal Session
Sometimes the terminal session does not inherit the correct environment variables. Closing the terminal window and opening a new one may resolve the issue.
After reopening the terminal, run the SSH agent command again and try adding your key.
Fix #5: Check Shell Configuration Files
Shell configuration files control how the terminal environment initializes. Files such as:
.bashrc.zshrc.profile
may contain commands that start or configure the SSH agent. If these scripts are missing the required initialization commands, the SSH agent may not start automatically when a new shell session begins.
Fix #6: Verify SSH Key Permissions
SSH requires strict permissions for private key files. If the key file permissions are incorrect, authentication may fail.
Run the following command to correct the permissions:
chmod 600 ~/.ssh/id_rsa
This command ensures that only the owner can read the private key file.
Fix #7: Test the SSH Connection
After adding the SSH key, you should test the connection to confirm everything works correctly.
For example, you can test authentication with GitHub using:
ssh -T git@github.com
If the connection works, the terminal will confirm successful authentication.
Fix #8: Restart the System
If the SSH agent continues to fail or the environment becomes unstable, restarting the computer may restore normal operation. A system restart reloads system processes and resets environment variables.
Prevention Tips for SSH Agent Issues
Maintaining a proper SSH configuration helps prevent authentication agent errors in the future. Developers and system administrators often rely on SSH keys for secure authentication, so stable configuration is important.
Helpful practices include:
- Configure the shell to start ssh-agent automatically
- Store keys in the default
.sshdirectory - Maintain correct permissions for private key files
- Avoid manually terminating the SSH agent process
- Keep the SSH client updated
- Use strong passphrases for SSH keys
- Test SSH authentication regularly
These steps help maintain a stable SSH authentication environment.
Conclusion
The error “could not open a connection to your authentication agent” appears when the terminal cannot communicate with the SSH agent process responsible for managing private keys. This usually happens when the agent is not running or the shell environment cannot locate the agent socket.
In most cases the problem is easy to solve. Starting the SSH agent, adding the key again, or restarting the terminal session will restore the connection. Once the agent runs correctly, tools like Git, GitHub, and remote servers can authenticate using your SSH keys without further issues.
If you have encountered this error while working with SSH or Git repositories, share your experience in the comments and let others know which solution worked for you.