
When a Steam game crashes immediately on launch, the cause is usually not mysterious: damaged local files, outdated graphics drivers, broken mods, missing runtime components, or conflicting background software are among the most common reasons. A launch crash may show an error message, briefly open a black window, or simply return you to the Steam library without explanation. The safest approach is to troubleshoot methodically, starting with the least invasive fixes before reinstalling the entire game or Windows.
TLDR: If a Steam game crashes on launch, first verify the integrity of game files through Steam to repair missing or corrupted data. Next, update your graphics drivers, Windows, and required game runtimes. If you use mods, disable them completely and test the game in a clean state, because corrupted or outdated mods are a frequent cause of startup crashes. Avoid random fixes from forums until you have checked logs, compatibility, overlays, and basic system requirements.
Why Steam Games Crash on Launch
A game that fails at startup is usually crashing during one of several early checks: loading configuration files, initializing graphics, scanning mods, connecting to anti-cheat, or building shader caches. Because these steps happen quickly, the user may see only a brief splash screen before the process closes.
Common causes include:
- Corrupted or missing game files after an interrupted update, disk issue, or failed download.
- Outdated GPU drivers that cannot properly initialize DirectX, Vulkan, or OpenGL features.
- Broken mods, especially after a game update changes scripts, assets, or dependencies.
- Conflicting overlays from Steam, Discord, GeForce Experience, Xbox Game Bar, or monitoring tools.
- Antivirus interference that blocks executable files or quarantines game components.
- Missing redistributables, such as Microsoft Visual C++, .NET, or DirectX runtime files.
- Incorrect launch options or damaged configuration files.
The key is to isolate the problem. Do not change ten settings at once. Instead, perform one fix, test the game, then move to the next step if the crash continues.
Step 1: Restart Steam and Your Computer
Before changing files or drivers, restart both Steam and your PC. This may sound basic, but it clears locked files, incomplete update processes, hung background services, and temporary memory problems. Fully exit Steam by clicking Steam > Exit, then restart your computer.
After rebooting, open Steam as normal and launch the affected game. If the game starts successfully, the issue may have been caused by a temporary process conflict or incomplete patch installation. If it still crashes, continue with file verification.
Step 2: Verify Integrity of Game Files in Steam
The most important first repair step is Steam’s built-in file verification tool. This checks your local installation against Steam’s official files and replaces anything missing, damaged, or outdated. It is safe, does not remove your save files in most cases, and often fixes launch crashes caused by corrupted assets or executables.
To verify integrity of game files:
- Open Steam.
- Go to your Library.
- Right-click the crashing game.
- Select Properties.
- Open the Installed Files tab.
- Click Verify integrity of game files.
- Wait until Steam finishes scanning and repairing files.
If Steam reports that files failed to validate and will be reacquired, let the download complete before launching the game. If Steam finds no problems, that does not necessarily mean the game is healthy, but it does mean the official Steam files are likely intact.
Important: File verification may restore official files, but it usually does not clean up extra files added by mods, manual patches, or third-party tools. If you have modded the game, you may still need to remove those files separately.
Step 3: Remove or Disable Corrupted Mods
Mods are one of the most common reasons games crash after an update. A mod that worked yesterday can break today if the developer changed the game’s scripts, engine version, item IDs, textures, or loading order. Even one outdated dependency can prevent the game from reaching the main menu.
To test whether mods are the cause, you need a clean launch environment.
- Disable all mods in the game’s mod manager or launcher.
- If using Steam Workshop, unsubscribe from recently added or suspicious mods.
- Check whether the game has a Mods, Plugins, or Custom Content folder.
- Move mod files temporarily to a separate backup folder outside the game directory.
- Delete generated mod cache files if the game creates them.
After disabling mods, run Steam’s Verify integrity of game files again. This helps restore official files that may have been overwritten by manual mod installation.
If the game launches without mods, re-enable them slowly. Add only a few at a time, then test. When the crash returns, you have likely found the broken mod or incompatible combination. Pay attention to dependencies, load order instructions, and whether the mod author has released a compatibility update for the current game version.
Do not assume a mod is safe just because it is popular. Popular mods can still break after major updates. Always read recent comments, update notes, and bug reports before reinstalling them.
Step 4: Update Graphics Drivers Properly
Graphics drivers are central to game startup. If a driver is outdated, corrupted, or incompatible with a recent game patch, the game may crash while initializing the renderer. This is especially common with games using DirectX 12, Vulkan, ray tracing, upscaling technologies, or new shader compilation systems.
Update your GPU driver from the official source:
- NVIDIA: Use GeForce Experience or download drivers from NVIDIA’s official website.
- AMD: Use AMD Software: Adrenalin Edition or AMD’s official support page.
- Intel: Use Intel Driver & Support Assistant or Intel’s official driver center.
Avoid downloading drivers from unofficial websites. They may be outdated, bundled with unwanted software, or unsafe. If you recently updated your driver and the game started crashing afterward, consider rolling back to the previous stable driver through Device Manager or by installing an earlier official release.
For persistent driver-related crashes, a clean driver installation can help. NVIDIA and AMD installers often include a clean install option. Advanced users may use a dedicated driver cleanup utility, but this should be done carefully and preferably after creating a restore point.
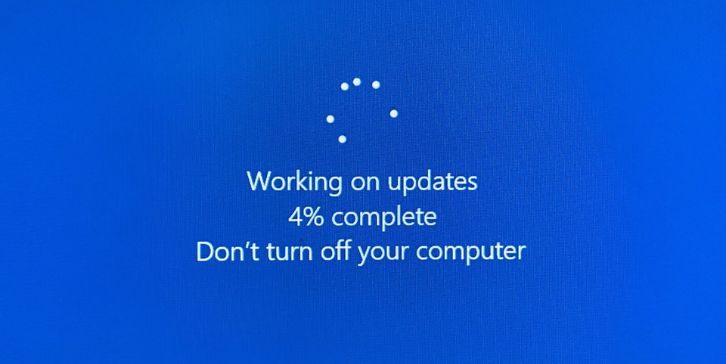
Step 5: Update Windows and Required Runtimes
Many Steam games depend on system components that are separate from the game itself. If these components are missing or damaged, the game may close immediately or show errors involving DLL files.
Check the following:
- Windows Update: Install pending security, feature, and driver-related updates.
- Microsoft Visual C++ Redistributables: Many games require specific versions from 2010 through 2022.
- DirectX Runtime: Older games may require legacy DirectX files not included by default.
- .NET Runtime: Some launchers, tools, and games depend on .NET components.
Steam often installs redistributables automatically during first launch, but this process can fail or be interrupted. Look inside the game’s installation folder for a directory named _CommonRedist or similar. If present, it may include installers for DirectX, Visual C++, or other required components.
Step 6: Clear Launch Options and Reset Configuration Files
Incorrect launch options can force a game into a mode your system cannot support. Examples include unsupported screen resolutions, old DirectX commands, incompatible Vulkan flags, or mod loader commands that no longer work.
To remove Steam launch options:
- Open Steam Library.
- Right-click the game and choose Properties.
- Under General, find Launch Options.
- Delete any custom commands.
- Close the window and test the game.
If the game still crashes, reset its configuration files. These are often stored in folders such as Documents, AppData, or Saved Games. Instead of deleting them permanently, rename the configuration folder first. For example, change GameName to GameName Backup. When the game launches again, it should create fresh default settings.
This can fix crashes caused by invalid display settings, corrupted user preferences, or outdated shader cache references.
Step 7: Disable Overlays and Background Conflicts
Overlays can interfere with game startup by hooking into the rendering process. While most overlays are safe, conflicts are common after driver updates or game patches.
Temporarily disable:
- Steam Overlay
- Discord Overlay
- NVIDIA GeForce Experience Overlay
- AMD Radeon Overlay
- Xbox Game Bar
- MSI Afterburner or RivaTuner Statistics Server
- Screen recorders and FPS counters
To disable the Steam Overlay for one game, right-click the game in your Library, select Properties, and turn off Enable the Steam Overlay while in-game. Then test the game again.
Also check antivirus or endpoint security software. If it recently quarantined a game file, restore it only if you are certain it came from Steam and is legitimate. You may need to add the game folder and Steam folder to your antivirus exclusions, but do so carefully and only with trusted installations.
Step 8: Check Anti-Cheat and Launcher Problems
Some games depend on anti-cheat systems or secondary launchers. If Easy Anti-Cheat, BattlEye, Rockstar Games Launcher, Ubisoft Connect, EA app, or another required service is broken, the game may fail before reaching the menu.
Look in the game folder for anti-cheat repair tools, often named EasyAntiCheat_Setup.exe or similar. Run the repair option if available. For secondary launchers, sign out and sign back in, update the launcher, and ensure it is not blocked by your firewall.
If the game works offline but crashes when connecting online, the issue may involve account authentication, anti-cheat, cloud saves, or server-side configuration. In that case, check the developer’s official status page or support forums for current incidents.
Step 9: Inspect Crash Logs and Windows Event Viewer
If basic fixes do not work, logs can reveal the failing component. Many games create crash reports in their installation directory, Documents, or AppData. Look for files with names such as crash.log, error.log, or output_log.txt.
You can also use Windows Event Viewer:
- Right-click the Start button.
- Select Event Viewer.
- Open Windows Logs.
- Click Application.
- Look for errors at the exact time the game crashed.
Pay attention to Faulting module name. If it mentions a GPU driver file, a missing DLL, an anti-cheat component, or a mod-related file, you have a stronger direction for the next fix.
Step 10: Reinstall Only After Cleaning Leftover Files
Reinstalling should not be the first step, but it can help when the installation is badly damaged. However, uninstalling through Steam may leave behind mod files, configuration folders, and cached data. If those leftovers are the cause, a normal reinstall will not fix the crash.
Before reinstalling, back up your saves if they are not stored in Steam Cloud. Then uninstall the game through Steam. Afterward, check the original install location and remove leftover folders related to the game, especially mod folders. Also check user data locations such as Documents and AppData, but be careful not to delete save files unless you have a backup.
Install the game again, launch it once without mods, and confirm it works before adding custom content back.
When to Contact Support
If the game still crashes after file verification, driver updates, mod removal, runtime repairs, and configuration resets, it is reasonable to contact official support. Provide useful information: your system specifications, GPU driver version, Windows version, crash logs, and a list of troubleshooting steps already completed.
A serious support request should include:
- The exact point where the crash occurs.
- Any error message shown on screen.
- Whether the game is modded or completely clean.
- Recent changes, such as updates, new hardware, or new drivers.
- Crash logs or Event Viewer details.
This helps support teams identify known issues faster and prevents repeated basic suggestions.
Final Checklist
- Restart Steam and your computer.
- Verify integrity of game files in Steam.
- Disable or remove mods, then test a clean launch.
- Update GPU drivers from the official manufacturer.
- Install Windows updates and required runtimes.
- Clear launch options and reset configuration files.
- Disable overlays and background monitoring tools.
- Repair anti-cheat or secondary launchers.
- Check crash logs for specific error clues.
- Reinstall cleanly only after backing up saves.
Most Steam launch crashes can be resolved without drastic action. Start with integrity verification, keep drivers and runtimes current, and treat mods as a likely suspect whenever a game has recently updated. A careful, step-by-step process is more reliable than guesswork and greatly reduces the risk of making the problem worse.


