One of the best ways to set up shipping rates based on item count in your cart is WooCommerce Table Rate Shipping PRO by Jem Products.
The plugin has many beneficial features that provide multiple options for setting up your shipping rates. Aside from charging shipping by item count, you can also charge shipping by weight, shipping classes, and so on.
Furthermore, you can create an unlimited number of shipping zones and rates, as well as set up rates based on logged-in user status or location – country, state, postcode, and so on. It is safe to say that this is the only shipping plugin for WooCommerce you will ever need.
How Does WooCommerce Table Rate Shipping PRO Works?
Let us jump straight to the point, charging shipping by item count. By default, WooCommerce does not offer you this possibility. In this part, we will explain why you should use this shipping rate method, and if so, then how to set up and use this plugin.
If you are trying to sell bulk items or expect your customers to buy multiple products, it won’t be good not to have this kind of shipping rate.
Let’s say, for example, your base shipping cost is 5$, and the customer wants to order 50 pairs of jeans that cost $40 per. Shipping costs $5 times 40 per pair using WooCommerce’s built-in shipping rates. This is quite repulsive to the customer, and they will soon be looking for a lower shipping cost.
Implementing shipping rate charging based on item count will help you retain customers by offering them a lower shipping cost per subsequent item.
For example, instead of paying $200 for shipping 40 pairs of jeans, your customer will pay a $5 base charge plus $1 per item, which equals $45 for shipping. Quite neat, right? We believe customers will be pleased with this rate instead of $200. So, how to set up this shipping rate?
Shipping Zone and Shipping Method

After installing the WooCommerce Table Rate Shipping PRO plugin, go to your WooCommerce store. Then go to your settings page and choose shipping opinion. The first step is to create a shipping zone, which is a geographical region in which a specific set of shipping methods and rates apply. Y
ou can create as many zones as you need, and your customers will only see those that apply to their address (location). When configuring a shipping zone, choose a zone name, zone region (country), and shipping methods where you will choose WooCommerce Table Rate PRO, which is our plugin of choice here.
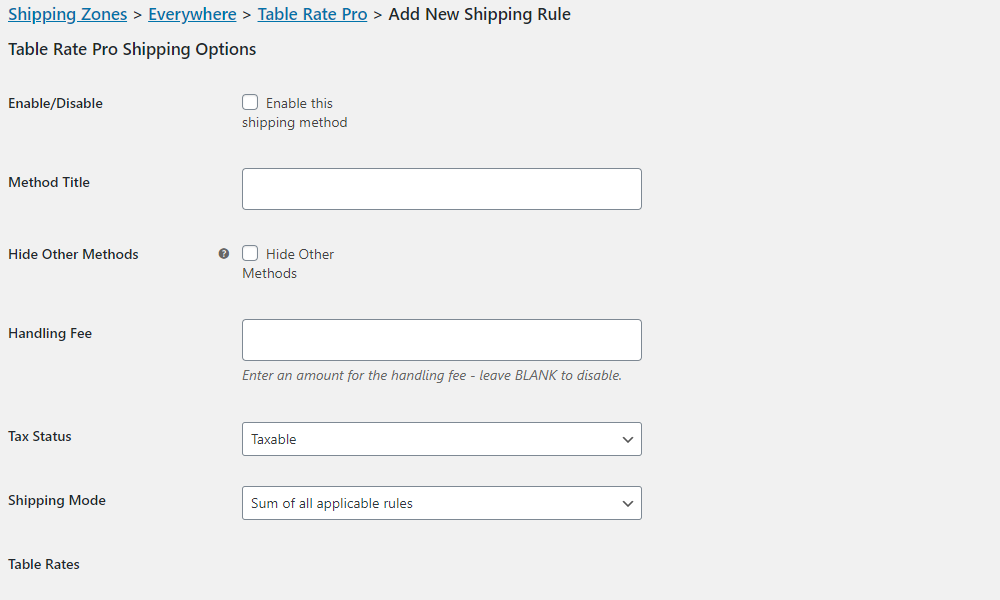
After you’ve configured this shipping method, go to the Table Rate PRO method’s edit option to modify the shipping rules. To add a new rule, click “Add New” and give it a name that will appear on the checkout page.
If you want, you can also add a handling fee, and if not, just leave this field blank, add the tax status, and add a new rate (or rule).
Table Rates

You will have a few options when adding a rate in this section, including applying the rule based on shipping class. We will apply the rule based on a condition, specifically “Item Count.”
In the following field, we want to specify the minimum value, zero in our case, and the maximum value of items, which will be infinite or simply a * sign. In the “Base Amount” field, we will specify the base cost of shipping for the order, let’s say, for example, $5.
The following “Per Item” field defines the price per item added to the base amount. Let’s say that number is $1, which means, for example, if you have 2 items in the cart, the total shipping cost will be $5 (base amount) + $2 (1$ per item for 2 items) = $7.
All that is left is to click on the “Save Changes” button, and that is it; your shipping rate is set up. Further, if you add an item and go to the cart, you will see the previously set up shipping method with our shipping rate.
The total shipping cost will change based on the “Per Item” value mentioned earlier as the item quantity increases or decreases. It’s as simple as that, with no additional complications.
More Facts About the Plugin
You could notice during the setup that this plugin offers plenty of options for setting up shipping rates on your WooCommerce store. With that in mind, it is a worthwhile investment for any retailer.
In addition to configuring these methods, you can use this plugin to import or export shipping methods, force the use of a specific method, hide orders, and so on. If you have any questions or issues while using this plugin, the support is one of the best on the market, and you will receive help with anything related to the plugin.

Despite being a frequently overlooked feature, this plugin also provides complete security and functionality updates as long as you are a subscriber.
Last but not least, you are getting a 60-day hassle-free money-back guarantee if you do not like the plugin. This plugin is highly versatile and offers a plethora of features and functionality. If you don’t want to install and configure this plugin yourself, a concierge service will do it for you while consulting with you and understanding your needs.
Conclusion
If you are wondering what to do next, consider the WooCommerce Order Export – PRO plugin, which will allow you to handle all of these orders most easily.
With the possibility of exporting all of the data you are interested in regarding orders, automating exports that are delivered directly to your email, reordering and filtering columns, etc., this is one of the most comprehensive order management plugins on the market.


Comments are closed.