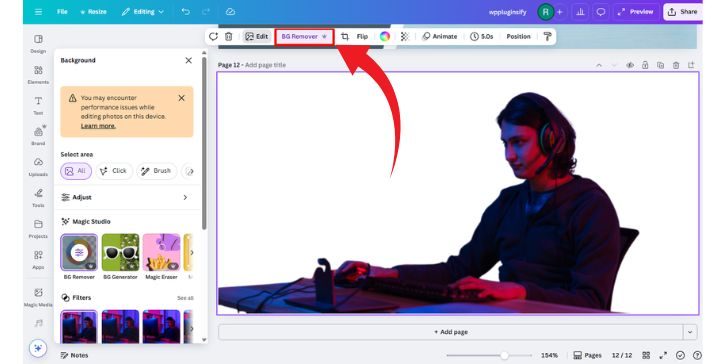
Making an image background transparent is a common task for product photos, profile pictures, logos, presentations, social media graphics, and web design. A transparent background allows the subject of an image to sit cleanly on any color, texture, or layout without a distracting box around it. Today, you do not need advanced editing software to do this; many reliable online tools can remove backgrounds quickly, often with only a few clicks.
TLDR: To make an image background transparent online, upload your image to a reputable background remover, let the tool detect the subject, then refine the edges if necessary. Download the final file as a PNG, because JPEG does not support transparency. For best results, use a high-resolution image with good lighting and clear contrast between the subject and the background.
Why Transparent Backgrounds Matter
A transparent background is useful because it gives you flexibility. Instead of being locked into the original background, you can place the subject over a website banner, a catalog page, a marketing design, or a simple white layout. This is especially important for businesses that need consistent visuals across different channels.
For example, an online store may want every product photo to appear on the same clean background. A consultant may need a professional headshot that works on both light and dark presentation slides. A designer may need a logo file that can be placed over a colored header without a visible white rectangle around it.
In practical terms, transparency helps images look more polished, more adaptable, and more professional.

What File Format Should You Use?
The most important technical point is the file format. If you want a transparent background, you should usually save the final image as a PNG. PNG supports transparency and preserves sharp edges well, making it suitable for logos, icons, product images, and cutout portraits.
By contrast, JPEG does not support transparency. If you remove the background and save the image as a JPEG, the transparent area will usually be replaced with a solid color, often white. This can be frustrating if you expected the background to remain invisible.
Other formats may also support transparency, such as WebP or SVG in certain cases, but PNG remains the safest and most widely accepted option for most users.
Step-by-Step: How to Make an Image Background Transparent Online
Although different online tools have slightly different interfaces, the general process is usually the same. Follow these steps carefully to avoid quality loss or unwanted edges.
-
Choose a reputable online background remover. Look for a tool that offers secure uploads, clear download options, and manual refinement features. If you are working with sensitive or client-owned images, review the privacy policy before uploading.
-
Upload your image. Select a file from your computer or mobile device. A high-quality original image will produce a better result than a small, blurry, or heavily compressed one.
-
Allow the tool to remove the background automatically. Most modern tools use artificial intelligence to identify the main subject and separate it from the background. This usually takes only a few seconds.
-
Inspect the cutout carefully. Zoom in around difficult areas such as hair, fur, glass, shadows, bicycle spokes, jewelry, or fine product details. Automatic tools are often impressive, but they are not perfect.
-
Refine the edges if needed. Use erase and restore brushes if the tool provides them. Remove leftover background fragments and restore any parts of the subject that were accidentally deleted.
-
Download the image as a PNG. Before saving, confirm that the file type supports transparency. If the background appears as a checkerboard pattern, that usually indicates transparency in the editor.
How to Get Better Results Before Uploading
The quality of the final transparent image depends heavily on the source photo. Even the best online background remover will perform better when the original image is clear, well-lit, and properly framed.
- Use good lighting: Avoid harsh shadows, dim environments, and overexposed areas.
- Create contrast: A dark object on a dark background or a white shirt on a white wall may be harder to separate cleanly.
- Avoid busy backgrounds: Complex patterns, clutter, or similar colors can confuse automatic detection.
- Use a high-resolution file: Larger images give the tool more detail to work with, especially around edges.
- Keep the subject fully visible: Cropped-off edges, motion blur, or overlapping objects may reduce accuracy.
If you are photographing products, place the item on a plain surface and use soft, even light. If you are creating a portrait cutout, stand slightly away from the background so the subject is easier to distinguish.

Common Problems and How to Fix Them
Even when the process is simple, a few common issues can affect the final result. Fortunately, most of them can be corrected with careful editing.
Rough or jagged edges: This often happens with low-resolution images. Try uploading a larger original file, or use a smoothing or feathering option if available. Be careful not to over-soften edges, especially on products with straight lines.
Missing parts of the subject: If the tool removes part of the object or person, use the restore brush. Work at a high zoom level and make small corrections rather than large strokes.
Background remnants: Small leftover patches are common around hair, transparent objects, or shadows. Use the erase brush manually. For product photography, pay close attention to corners, handles, labels, and reflective surfaces.
Unnatural halos: A light or dark outline around the subject can appear when the original background color reflects onto the edges. Some tools offer edge cleanup features. If not, try placing the subject over a similar color background or manually trimming the edge.
When Automatic Background Removal Is Enough
Automatic online tools are suitable for many everyday uses. They are particularly effective when the subject is clearly separated from the background. Simple product photos, headshots, animals, vehicles, furniture, and basic objects often produce strong results without much manual editing.
For social media posts, internal presentations, marketplace listings, profile images, and quick marketing materials, an automatic transparent background may be entirely sufficient. The process saves time and removes the need for complex desktop software.
However, for professional advertising campaigns, large print materials, luxury product photography, or images with very fine details, a manual review is still important. A transparent background that looks acceptable at small size may reveal flaws when enlarged.
Privacy and Security Considerations
Because online background removal requires uploading an image, privacy should not be ignored. Avoid uploading confidential documents, unreleased product designs, private identification images, or client materials unless you trust the service and understand how uploaded files are handled.
Before using any online tool for sensitive work, check whether the service explains file storage, deletion timing, and data use. A serious provider should make these details easy to find. If the image is commercially important, consider whether an offline editing workflow may be safer.
Best Practices for Business and Brand Images
If you are preparing transparent images for a business, consistency matters. A set of product photos should have similar cropping, scale, color balance, and shadow treatment. A collection of staff headshots should use similar framing and lighting. Transparent backgrounds are useful, but they should support a coherent visual style.
- Keep consistent margins: Do not crop one product tightly and leave another with large empty space.
- Use realistic shadows only when appropriate: Shadows can add depth, but inconsistent shadows may look unprofessional.
- Check images on light and dark backgrounds: This helps reveal halos, rough edges, or missed areas.
- Save original files: Keep an untouched copy in case you need to re-edit the image later.
Final Checklist Before Downloading
Before you consider the job finished, take a minute to review the image carefully. A quick check can prevent visible mistakes later.
- Is the background truly transparent?
- Is the file saved as PNG or another transparency-supporting format?
- Are the edges clean when zoomed in?
- Are important details preserved?
- Does the image look good on both dark and light backgrounds?
Making an image background transparent online is now a straightforward process, but the best results still come from careful preparation and review. Choose a trustworthy tool, start with a high-quality image, refine the cutout where necessary, and download the result in the correct format. With these steps, you can create clean, flexible images that are ready for websites, presentations, product listings, and professional design work.