Blogging has become a commodity for many startups and business to promote their reachability on the internet. For this purpose, WordPress, the most popular content management system becomes the priority source to achieve the objective.
WordPress lets its users break and create the content, design, and layout in many ways, but still, there always remains a room for improvement. And this room is occupied by a Content Delivery Network that by and large serves as an outsource to localize and speed up the continuous information delivery.
A high-level CDN not only make your WP website more responsive, it also boosts the page loading and cuts the cost to a minimum. Just so you know, the website visitors don’t even wait for two seconds for a page to load, therefore, a CDN is a must now.
Amazon CloudFront is one of the most used and appraised Content Delivery Networks that wonderfully distributes information through various servers while coping major traffic hurdles. CloudFront has various basic servers, including, US, UK, Canada, and Asia. These servers are further classified into micro-locations.
Benefits of Amazon CloudFront
Briefly, Amazon CloudFront provides the following benefits:
- Reduces lagging and latency in data distribution and page loading.
- Eliminate delays.
- Faster download speeds for HD or large media.
- Better consistency.
- Improved accessibility.
Functions of Amazon CloudFront
After you are done setting up your AWS account, CloudFront Distribution, and S3 bucket, you can get connected to a cloud server on the large level. Any media file uploaded or any information retrieved can be delivered to the users within a matter of seconds with CloudFront.
More than that, the WordPress site owners can enjoy fast media uploading and sharing, store numerous downloads, or even buffer and stream videos.
So, if you are looking forward to setting up and configure Amazon CloudFront to speed up your WordPress Website, you have come the right place:
1. Create an AWS account
Before you begin to create the account, you need to make sure that you have admin rights on the WP-website and have access to your website’s servers. Once you have made sure that you have the rights, start making your own AWS account.
It is as casual as signing up for any paid services available on the internet. Just put in your AWS credentials and get access to all the services. Though most of these services need to be paid. You can use some for free if you are signing up for the first time.
2. Create a CloudFront Distribution
When you sign up, you require to create a CloudFront distribution. This distribution then becomes a source to manage and configure multiple configurations linked to your website.
To create the CloudFront distribution, you need to have an authorized domain as well as a CNAME which directs the relevant server towards your WP website. But in case you are a newbie, the existing DNS will proceed the registration via your IP address and DNS name,
Such as: <DNS.friendly.name> ⇒ <WordPress DNS name or IP>

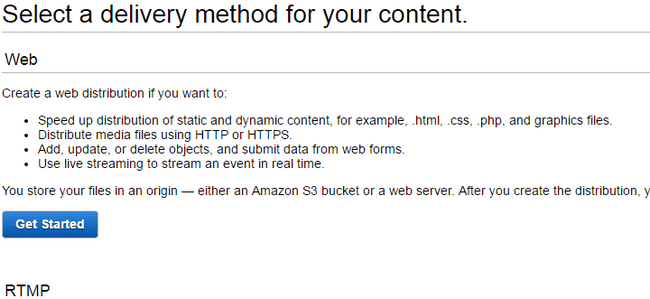
What you got to do is: reach your AWS console > click ‘Storage & Content Delivery’ > choose CloudFront > create distribution > web section > Get Started
To save the files, you have to put the CDN account URL to transport all files from your WP-website to your CDN account.

About RTMP, it’s about uploading and streaming media via a CDN.
Furthermore, you can create a CNAME to ornament the URL of your website’s files. You will be required your DNS interface or server panel such as cPanel to create a customized CNAME.
3. Install and Setup W3 Total Cache

To make the collaboration work easy, WordPress and CDN entail a plugin, most likely W3 Total Cache, to make the functioning more sophisticated and simultaneous.
Let’s check how do we configure it:
Go to the CDN option > plugins > General Settings > Select “Amazon CloudFront” (beneath the Origin drop-down) >
After saving these settings you can access the W3 Total Cache Plugin and its settings. To get access you can reach the CDN, enter the Secret Access Key and Access Key in the “Configuration” section. This will spontaneously pull in the file bucket you previously created, which can now be selected right next to the “Origin”.
It is the easiest and recommended way to set up the WordPress plugin.
4. Don’t Forget Testing!
It is very crucial to certify and test every function of your website. A software testing company like Kualitatem can provide you with the high-level functional testing for your website. While the assistance of a potent test case management tool like Kualitee makes the testing and its management much smoother.
Wrapping Up
Amazon CloudFront is an ultimate Content Delivery Network if you are seeking to grow and engage some potential audiences. If you already own a blog that has a worldwide audience and is on the verge of crashing, you must opt for the Amazon CloudFront.


Comments are closed.