
Using tables in WordPress is an excellent method to present data in a structured and organized format. It is easy to read and understand the tables and charts. It is also beneficial to use tables to display data arranged in columns and rows.
When using WordPress, there are various methods to insert tables. The most straightforward way since Gutenberg, the new block-based editor in WordPress, was introduced in version WordPress 5.0 is to use the predefined table block. The table block is simple to use and works great. However, more choices and configuration options would be appreciated.
If you want more customization choices for creating tables, you should install a WordPress plugin, especially if you use software like ScraperBox so you can arrange the data to your exact preferences. There are some excellent table plugins. But the most popular is TablePress, with over 800,000+ installations. I use this plugin on several of my websites.
A while ago, I got an email about a plugin that caught my attention. WP Table Builder is the name of the plugin. It is a responsive drag and drop table builder plugin with the ability to insert five predefined elements in tables.
For you guys to see how WP Table Builder work, I wrote this tutorial on how to install and add tables with WP Table Builder and also my assessment of the plugin.
WP Table Builder – WordPress Table Plugin
WP Table Builder is a free WordPress table plugin you can download from WordPress.
It is a shortcode based plugin, which means that you create a table within the plugin, but you display the table by inserting a shortcode into a blog post or page on your WordPress website.
Furthermore, it is also a drag and drop based plugin, which allows you to drag and drop available elements into any cell to present data such as text, images, buttons, lists, and star ratings.
Some features included WP Table Builder
| 5 Elements | Drag and Drop | Responsive Tables |
| Elements Customization Options | Cell Management Mode | Shortcodes |
I tested the WP Table Builder plugin, and if you want to use a WordPress table plugin, this can be a suitable and creative alternative. Let’s find out what you can do with this plugin.
Install WP Table Builder

First of all, you need to install the plugin. You install the WP Table Builder plugin just like any other plugin. In your admin dashboard, go to -> Plugins -> Add New -> Add WP Table Builder in the search box -> Click Install Now and -> Activate.
For those of you who want to install via FTP do the following. Download the plugin and extract the plugin ZIP file on your local computer. Upload the plugin folder containing your plugin files.
The WP Table Builder plugin should now be visible in the list of plugins. Activate the plugin, and you are ready to go.

After you installed the plugin, in your dashboard menu, there is now a new tab named Table Builder. Also, two sub-tabs All Tables and Add New. Self-explanatory menus. You handle all the tables, and you create new tables with these tabs.
Create a New Table

We take the plunge and create a new table by clicking -> Add New. Start with the new table and select numbers of columns and numbers of rows. Click Generate.
Build and Edit the Table
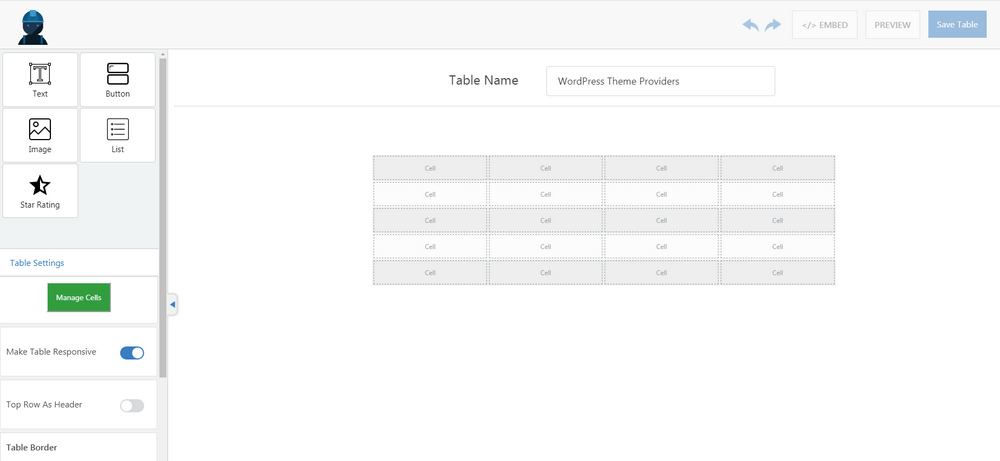
You can now start building the table with available elements.
Elements available are Text, Button, Image, List, and Star Rating. By dragging and dropping the element into the table, you can easily insert any element wherever you want in the table.
Add text, images, and more. If you want to edit a table cell, select the cell you want to edit, and you can see configuration options above the table or to the left of the table, depending on which element you are editing.

My table is almost ready. I have created a small list with a couple of WordPress theme providers, as you can see in the picture. But I missing something and I want to add another column.
If you want to edit all cells in the table and add more columns or rows, click on – Manage Cells to the left of the menu.

A new view opens up, and you can easily add or delete columns and rows. I choose to add an additional column — all set.

In the new column, I add buttons with links to the particular websites represented in the table.
As you can see, there are several options in the menu on the left where you can configure each element in the table. For example, for buttons, you can change button size, change text color, add links, and select button alignment.
It is a lot of fun to play around with the elements avaible, change settings, colors, fonts, and more. It is straightforward to create attractive tables, and this is a plugin in my appreciation.

When you are feeling done with your table, you can preview it by clicking the Preview button.
If you are not satisfied, then continue to configure your table to best look and style.
Save the table with the – Save Table button.
Click the EMBED button, copy the code, in my case the code looks like this – [wptb id=30] and save it for later to insert it into a post or page.
Insert Table Into a Post or Page
When done with our creative table, it’s time to insert it into a blog post or page if you prefer.
Create a new blog post or page. Paste the code you copied earlier.

Here is what it looks like in the Gutenberg editor.

In the Classic editor. (Yes, there are a lot of people still using the classic editor).
The final results of my table look like this below.

Not too bad! However, with a little creativity and time, it is possible to create even more great-looking tables without any knowledge of coding.
Pros and Cons
Pros
- Above all, I want to give a big plus to the user-friendly interface. All features and customization options are easy to find.
- The five elements available work well, and I like all the customization options, which allows you to customize the elements and cells with a variety of settings.
- All essential buttons like Manage Cells, Preview, Embed, and Save Table are prominent and visible.
Cons
- I lack the filtering options for tables. If you are building extensive and large tables, it is preferable to add filtering options so that visitors can easily filter the contents of the table.
- Although there are six contributors and developers involved in developing the plugin, there are several unsolved support tickets.
In Conclusion
When it comes to add tables in WordPress, it is essential to find a plugin that meets the criteria you require to present the data in the best way.
WP Table Builder is an excellent and handy WordPress plugin for building and creating tables with an appealing and user-friendly interface. Better than most plugins I have used.
Despite some shortcomings, such as filtering options (maybe an idea for future versions?), WP Table Builder is a WordPress table plugin that I recommend for its simplicity in creating attractive and great looking tables.


")
Comments are closed.