Instagram is already one of the largest social platforms, but it keeps growing due to the global popularity of visual content. The image-sharing network breached the 1 billion user threshold in June 2018, becoming the third most popular social media in the world, right behind Facebook and YouTube.
However, a number of practical and free features turned Instagram into the genuine lead generation driver. Today, most businesses use it to share brand-related content and raise awareness among targeted customers. To put it simply, Instagram offers you benefits such as:
- Audience targeting and analysis
- Engagement and interaction with the prospects
- Awareness raising
- Lead generation and conversion rate increase
But the one thing that webmasters keep forgetting is that WordPress allows them to embed Instagram photos to their websites, and this is the feature we want to discuss in this post. Let’s take a look!
How to Embed Instagram Photos to Your Website

Instagram photo embedding is a relatively new solution, so we want to explain it step by step. The first thing to do is to choose an image you want to share on a WordPress website. When you click this photo, you will find the Embed Link option in the lower part of the screen.
This feature lets you choose between three options:
- Report Inappropriate
- Embed
- Cancel
Of course, you will choose Embed and then Copy Embed Code. After that, go to the WordPress dashboard to enter one of your old posts or to create a brand new page. This will be the final destination of your Instagram photo, so you only need to paste the copied Embed Code to the Text Editor.
Wendy Franklin, a WordPress developer at CareersBooster, says there is another – even simpler – way to complete this process:
“You can copy the link of your photo, paste it to the Text Editor, and the image will appear on the desired webpage. Just like the first solution, this one also doesn’t demand expert knowledge, tools, or web design experience.”
Bonus Solutions to Display Instagram Images on a Website
The two functions we described above are great if you want to transfer single images to the WordPress website. However, some webmasters also want to copy/paste entire Instagram galleries or to enable linking from webpage photos to the original source comes from their Instagram accounts.
In this case, you’ll need a special tool to ensure seamless integration of WordPress and Instagram. We will show you two widgets that proved to be very useful in this field:
1. InstaShow WordPress Widget

InstaShow WordPress Widget is a tool designed with the purpose to connect Instagram accounts with your website. Using it, the website becomes another channel to promote your social account. The widget has a built-in Follow button that transfers visitors directly to the Instagram profile.
It’s a feature that improves brand recognition and inspires more users to engage with your content by liking images, sharing, or writing comments. InstaShow WordPress Widget offers a plethora of other possibilities such as over 60 customization features, permalink and username combinations, high-quality user interface, image adjustments, descriptions, view counters, and many more.
Besides that, the tool is easy to use:
- Choose the source and select images based on preferences like hashtags.
- Set the image dimensions and color design to make a responsive widget.
- Copy and paste the code to the targeted webpage.
You can use InstaShow WordPress Widget free of charge, but it only works for up to 200 views per profile. If you want a more serious version of the widget, check out the PRO package for $5 a month.
2. Instagram Slider Widget

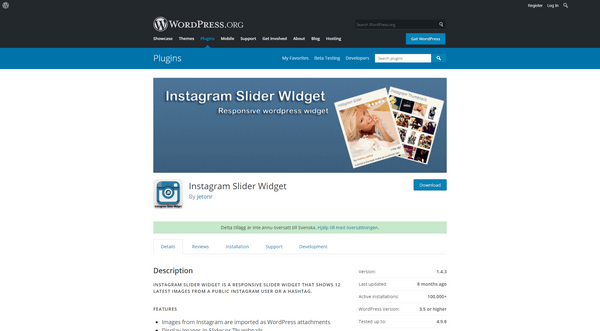
Instagram Slider Widget is a simple tool that enables you to show up to 12 most recent Instagram images. This widget allows you to display Instagram photos as thumbnails or in the slider form. The installation procedure is easy:
- Upload the widget to the /wp-content/plugins/directory.
- Activate it through the \’Plugins\’ menu.
- Go to Appearance → Widgets and drag \’Instagram Slider Widget\’ to your sidebar.
- Update settings in the widget: Instagram Username, Images Layout, Number of Images to show, Check for new images hours.
As for the settings, there are several details to arrange here. Firstly, you should create a widget title along with the corresponding Instagram account. You can choose accounts by usernames or hashtags.
Secondly, you can choose whether to save images or not. There are also indicators like image format, display order, link attributes, and a bunch of other technical specifications. Instagram Slider Widget is a free plugin, so you can use or test it whenever you want.
While manual Instagram connections enable you to display images on a website quickly and simply, they also limit the number of options. But if you use one of the plugins we described here, you can gain full control over Instagram accounts and display images on the website in a way that suits the needs and style of your brand.
Conclusion
As one of the most popular social networks, Instagram can help you to raise awareness, generate new leads, and increase sales in the long-term perspective. But it can also enrich your WordPress website by embedding photos directly from Instagram.
We made this article to explain to you how to display Instagram images on WordPress. It’s a valuable feature that boosts cross-channel promotion, so we strongly encourage you to give it a try – it will make your website more attractive and probably earn you some fresh Instagram followers in the process.


Comments are closed.